動機
- IFTTT のアプレットがいつの間にか Disconnect になり、困ることがあった
- 1年で3回ぐらい遭遇した
- 有料版を使用
- アプレットのConnect状態をスクリプトで毎日監視し、LINE通知で確認しよう
結果
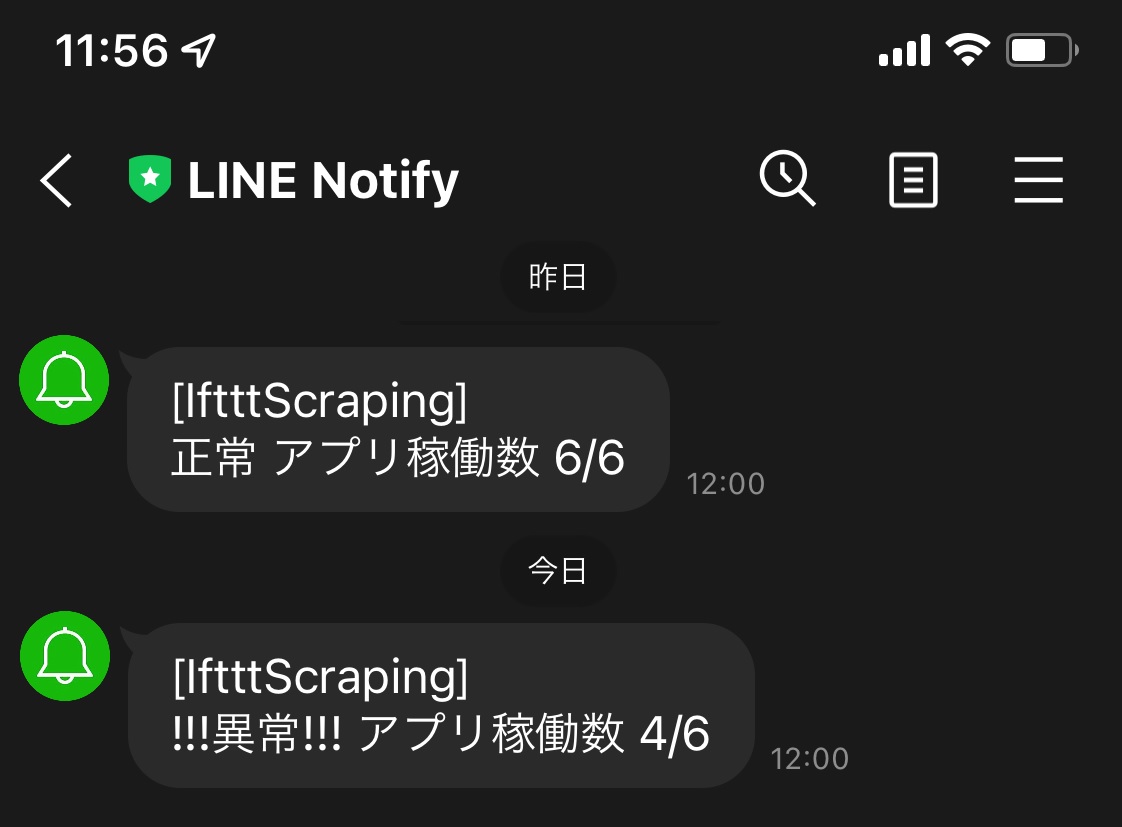
以下のように、LINE通知で IFTTT の状況を把握できるようになりました。
アプレットの接続状態を心配する日々から解消されました。
(毎日の通知音は不要なので、LINE Nofity はミュートにして任意タイミングで見るようにしています)
事前準備
- Python環境(例:WSL2 に Anaconda経由で JupyterLab環境を構築する手順)
- WSL にGoogle Chromeインストール(手順:【Ubuntu Server 20.04】Google Chromeをインストールする手順)
- pip install request
- pip install webdriver-manager
- pip install selenium
- pip install beautifulsoup4
- pip install lxml
- ちなみに、WSL でなくても、Chromeと上記5パッケージがインストールされていればOK
- IFTTT のアカウント
- Apple, Google, Facebook でのログインではなく、IFTTT 単体でログインできるようにしておく
- LINE通知のアクセストークン
- PythonでLINEにメッセージを送る
- PCからLINEにログインできない場合は、スマホのLINEの「設定」-「アカウント」-「他の端末と連携」の「ログイン許可」をON
ソースコード
# coding: UTF-8

# スクレイピングで使用
from time import sleep
from bs4 import BeautifulSoup
from selenium import webdriver
from webdriver_manager.chrome import ChromeDriverManager
from selenium.webdriver.chrome.service import Service
from selenium.webdriver.chrome.options import Options
from selenium.webdriver.common.keys import Keys
from selenium.webdriver.common.by import By
import re

# LINE通知で使用
import requests

print("【IFTTT の MyApplet の Connect状態を取得するスクリプト】")

# IFTTT のログインページ
url = "https://ifttt.com/login?wp_=1"

# ログイン情報
email = "IFTTTアカウントのメールアドレス"
password = "IFTTTアカウントのパスワード"

# オプション設定
options = Options()

# headlessモード(ブラウザを描画しない)
options.add_argument('--headless')

# UA設定(適当なUAで偽装すればOK)
UA = 'Mozilla/5.0 (Windows NT 10.0; Win64; x64) AppleWebKit/537.36 (KHTML, like Gecko) Chrome/98.0.4758.102 Safari/537.36'
options.add_argument('--user-agent=' + UA)

# ドライバ起動
service = Service(ChromeDriverManager().install())
driver = webdriver.Chrome(service=service, options=options)

print("【ドライバ起動完了】")

# ログインページにアクセス
ret = driver.get(url)

# ページ遷移のため少し待つ
sleep(2)

print("【ログインページアクセス完了】")

# ユーザー情報を設定し、ログイン
driver.find_element(By.ID, 'user_username').send_keys(email)
driver.find_element(By.ID, 'user_password').send_keys(password)
driver.find_element(By.NAME, 'commit').send_keys(Keys.ENTER)

# ページ遷移のため少し待つ
sleep(2)

print("【ログイン完了】")

# MyAppletsページにアクセス
driver.get("https://ifttt.com/my_applets")

# ページ遷移のため少し待つ
sleep(2)

print("【MyAppletsページアクセス完了】")

# ページソースからsoupオブジェクトを作成
# "html.parser" でもよいが、高速化のため lxml を使用
soup = BeautifulSoup(driver.page_source, 'lxml')

# 確認のためページのソースを表示
#print(soup)

# ドライバをクローズ(以降は BeautifulSoup での操作)
driver.close()
driver.quit()

# my-web-applet-card web-applet-card なる class にアプレットたちが記載されているので取得
applets = soup.find_all('li', class_='my-web-applet-card web-applet-card')
applet_num = len(applets)
#print(applet_num)

# アプレットごとに名前とConnect状態を取得し、Connected なアプレット数を取得
print("【アプレット情報を取得】")
connected_num = 0
regex_name = re.compile(r'<div style="display: block;">(\w.*?)</div>')
regex_status = re.compile(r'"object_id":"(Connect(|ed))"')
for applet in applets:
    #print(applet)
    name = regex_name.search(str(applet))
    name_g = name.group(1)
    status = regex_status.search(str(applet))
    status_g = status.group(1)
    print(name_g + ":" + status_g)
    if status_g == "Connected":
        connected_num += 1

# LINE通知時のメッセージを作成
# MyApplet が6個あるとして、6個とも Connected なら正常とする
connect_result = str(connected_num) + "/" + str(applet_num)
print(connect_result)
if connected_num == 6 and applet_num == 6:
    message = "正常 " + connect_result
else:
    message = "!!!異常!!! " + connect_result


#
# LINE通知
#

# エンドポイント
url_line = "https://notify-api.line.me/api/notify"

# メッセージ生成
ACCESS_TOKEN = 'アクセストークン'
headers = {'Authorization': 'Bearer ' + ACCESS_TOKEN}
payload = {'message': ' ' + message}

# 通知
requests.post(url_line, headers=headers, data=payload)

print("【LINE通知完了】")
print(message)
定期実行
WSL, Anaconda 仮想環境でのPython実行であれば、以下をWindowsタスクスケジューラに1日1回のタスクとして登録します。
プログラム:wsl.exe
引数の追加:/home/ユーザー名/anaconda3/envs/仮想環境名/bin/python /home/ユーザー名/IftttScraping/IftttScraping.py; read Wait
仮想環境以下の Python を指定することで、該当の仮想環境で pip したパッケージが使用できます。
(conda activate してから python 実行したのと同等)
read Wait を加えることで、実行結果を確認可能です。
備考
- IFTTT に自動ログインするのは1日1回程度にしておきましょう
- サーバーに負荷を与えるスクレイピングはよろしくありません
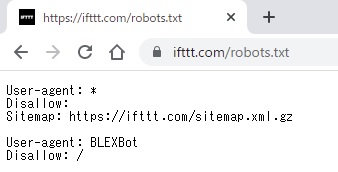
- https://ifttt.com/robots.txt を見る限り、常識の範囲でのスクレイピングは許されていそう(2022/02/24現在)
- requests.session() で UA や authenticity_token を付けるのも試したがログインできなかったので、requests ではなく selenium を選択しました